
How to Rip a CD with iTunes & Import MP3s on Mac & Windows
Do you have some audio CDs laying around that you’d like to digitize and convert to mp3? Ripping a CD and turning the audio into MP3 or M4A tracks is remarkably simple with iTunes, and the process its he same on both a Mac and Windows PC.


Do you have some audio CDs laying around that you’d like to digitize and convert to mp3? Ripping a CD and turning the audio into MP3 or M4A tracks is remarkably simple with iTunes, and the process its he same on both a Mac and Windows PC.
This is a great approach if you want to digitize a CD music collection to bring onto a computer for archival purposes, listening through iTunes, or even for later copying to an iPhone or iPad.
Now I know what you’re thinking, not many modern Macs and PCs have CD or DVD drives anymore, right? But that shouldn’t stop you from ripping a CD if your really want to, because you can use any external CD / DVD drive, a SuperDrive (you can also use an Apple SuperDrive with Windows), or even use Remote Disc to share a CD/DVD drive from another Mac.
To use this tutorial to convert a regular audio CD into MP3s, you will need the following:
iTunes on a Mac or Windows PC CD drive (or you can get an external CD / DVD drive) A standard audio CD, like a music album
Assuming you meet those simple requirements, you’re ready to convert the audio CD into MP3 files on the computer. Let’s get started.
How to Rip a CD with iTunes
The process of ripping a CD and turning the audio into MP3 files is the same whether iTunes is on a Mac or Windows, here’s how it works:
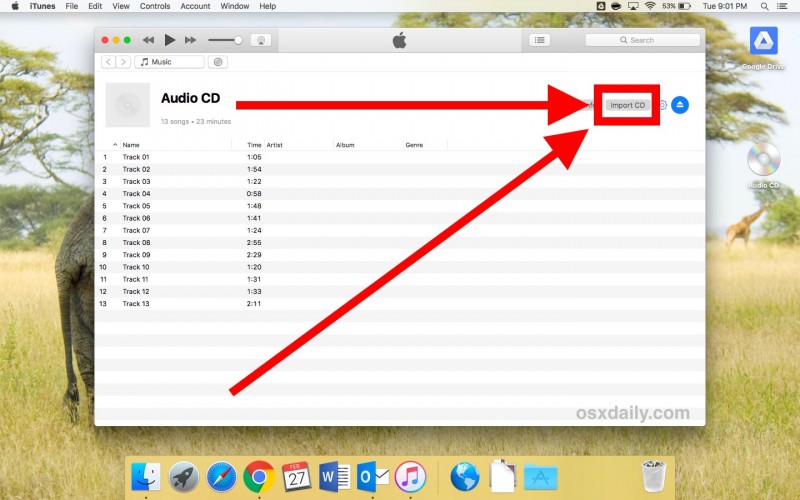
- Open iTunes on the computer you want to import the songs to Insert the CD you want to rip and turn into MP3s When iTunes recognizes the disc and shows the “Audio CD” screen, click on the “Import CD” button
A progress bar will appear in the top of the iTunes screen, just wait for this to finish after iTunes is finished importing the CD
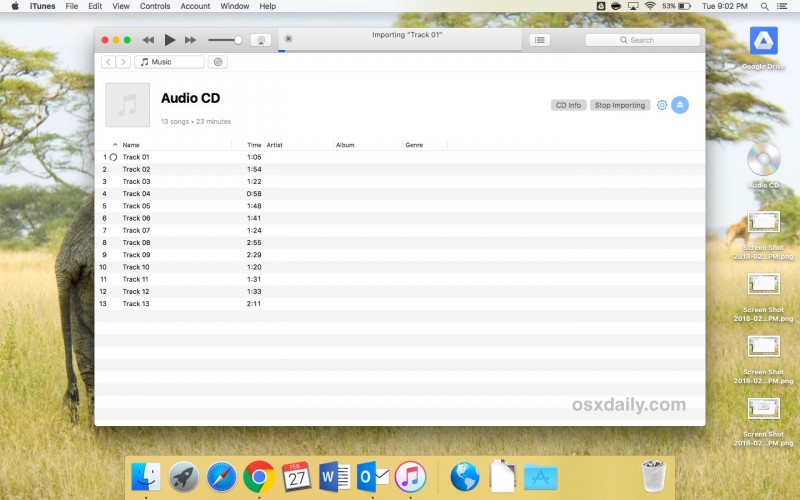
When completed, the progress bar will vanish from iTunes and the audio tracks will have a little green checkmark next to them in iTunes.

You’re done, you now have MP3s of your songs from the CD! Now you can eject the CD from iTunes and you’ll find the mp3 tracks in your regular iTunes music library. If you’re ripping a large collection of CDs repeatedly, once you’re done you might want to get album art for iTunes too so that the iTunes library looks like it’s supposed to.
As a quick side note, iTunes will default to import an audio CD using an MP3 encoder with high quality settings at 160 kbps. Those iTunes import settings can be changed if necessary, to either raise or lower the quality and bitrate, or to change the import format from MP3 to M4A if desired.
Once the songs are stored in your iTunes library, you can do whatever you want with them. Listen and enjoy, copy them to your iPhone or iPad, make them into ringtones for an iPhone (just remember that copying iTunes to an iPhone has changed in new iTunes versions and it’s a little different), whatever you want.
Enjoy your freshly ripped music! And if you have any questions or comments about using iTunes to rip CDs into mp3 format, let us know in the comments below.